Installation & Resources
Instructions and tips, company resourcesSXS universal linkage slide plate mounting instructions
Mounting may be achieved in 3 different ways
- Rivets- Recommended for steel frame bikes without holes or no threaded holes
- Bolts- Recommended for aluminum frame or steel frame with existing threaded holes
- Existing skid plate- Recommended to slide linkage plate under your skid plate
Review which method is best for your application. This kit is “universal” which means you will need to determine what will work best for your frame and skid plate configuration. Keep in mind how you will change your oil while making this decision. (i.e. make sure your linkage slide plate doesn’t interfere with removal of your existing skid plate) In all cases if you feel this is above your mechanical ability, enlist a buddy or a motorcycle tech. Each bike and skid plate manufacturer will make mounting this linkage slide plate different for everyone. Many are similar, but may require more ingenuity than others. Take your time looking and aligning your slide plate in the best location. Before you drill always mark the linkage slide plate double checking your marks then drill. A black or silver sharpie works well to mark the plastic.
Thermoforming may be required to get the correct angle to the frame and linkage. The plate comes pre bent to help you get “close.” If you need to change the angle, a heat gun or propane torch work best. A hair dryer will work, it will just take longer to heat and bend the plastic. Wear a pair of riding or mechanic gloves, leather palms work best. Heat plastic and bend slightly over your desired angle, the plastic will reflex a little less of your desired angle. White plastic bends easier and can take more heat. Take your time with black plastic, less heat and more time. Once your linkage slide plate is mounted you can “help” your plate bend around your shock and linkage, but it’s not necessary, the plate will form while you ride.
Install time .5hr to 1hr. Depending on skills, tools and number of beers consumed during the install process. As with any product you may be hurt while installing or using your SXS linkage slideplate. Take responsibility for your own actions. We all ride and would like to remain riding and racing, instead of talking to and paying for lawyers.
Good Luck and Have fun sliding over obstacles that once held you up!
Kit includes
- UHMW plastic slide plate
- 3/16 stainless pop rivets
- 6mm X 1.0 X 25mm stainless bolts and washers
- 8mm X 1.25 X 25mm stainless bolts and washers
You may need
- Patience and a mounting strategy
- 3/16 or #11 drill bit & pop rivet gun when using rivets
- Drill and Tap for 6mm X 1.0mm bolts if using 6mm
- Drill and Tap for 8mm X 1.25mm bolts if using 8 mm
- Hex key (allen wrench set) or hex socket set
- Paint pen, permanent marker, nail polish or other marking device
- Center punch and hammer
- Drill and Required bits to allow for your desired mounting hardware
- Utility knife & pliers- to trim slide plate for flusher mount (see aluminum mount)
- Heat gun, propane torch or hair dryer
Additional parts/tools available
- 3/16 drill bit NAPA part # HSD 516 $2.99
- 6mm X 1.0mm tap NAPA part # 55211 $3.88
- 8mm X 1.25mm tap NAPA part # 55261 $4.88
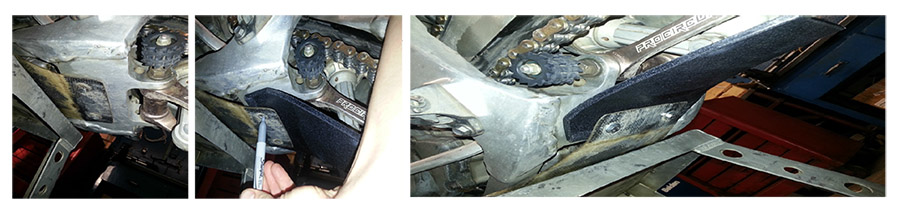
Steel Frame Mounting
Locate mounting area. Some frames have holes in the rear of the frame. If so utilize those holes. If threaded holes exist run supplied bolts into holes, mark bolt heads with paint, align linkage slide plate and press firmly onto painted bolts. Drill holes in slideplate. Remove bolts and run through slide plate, use blue loctite on bolts.
If no holes are found 3/16 or #11 holes will need to be drilled to use pop rivets. I find it easier to locate, mark and drill the slide plate first, then hold the plate to desired location and use a center punch or use the drill in reverse to mark your holes to be drilled.
After holes have been checked for correct alignment, drill frame with 3/16 or #11 bit. Remember most frames are chromoly, it is tougher to drill than mild steel. Use patience or multiple size drill bits stepping up to 3/16.
Place pop rivets through SXS linkage slide plate and install using pop rivet tool/gun. You may find it easier to drill your slide plate to the next size or elongate holes for easier mounting. This will not affect durability.
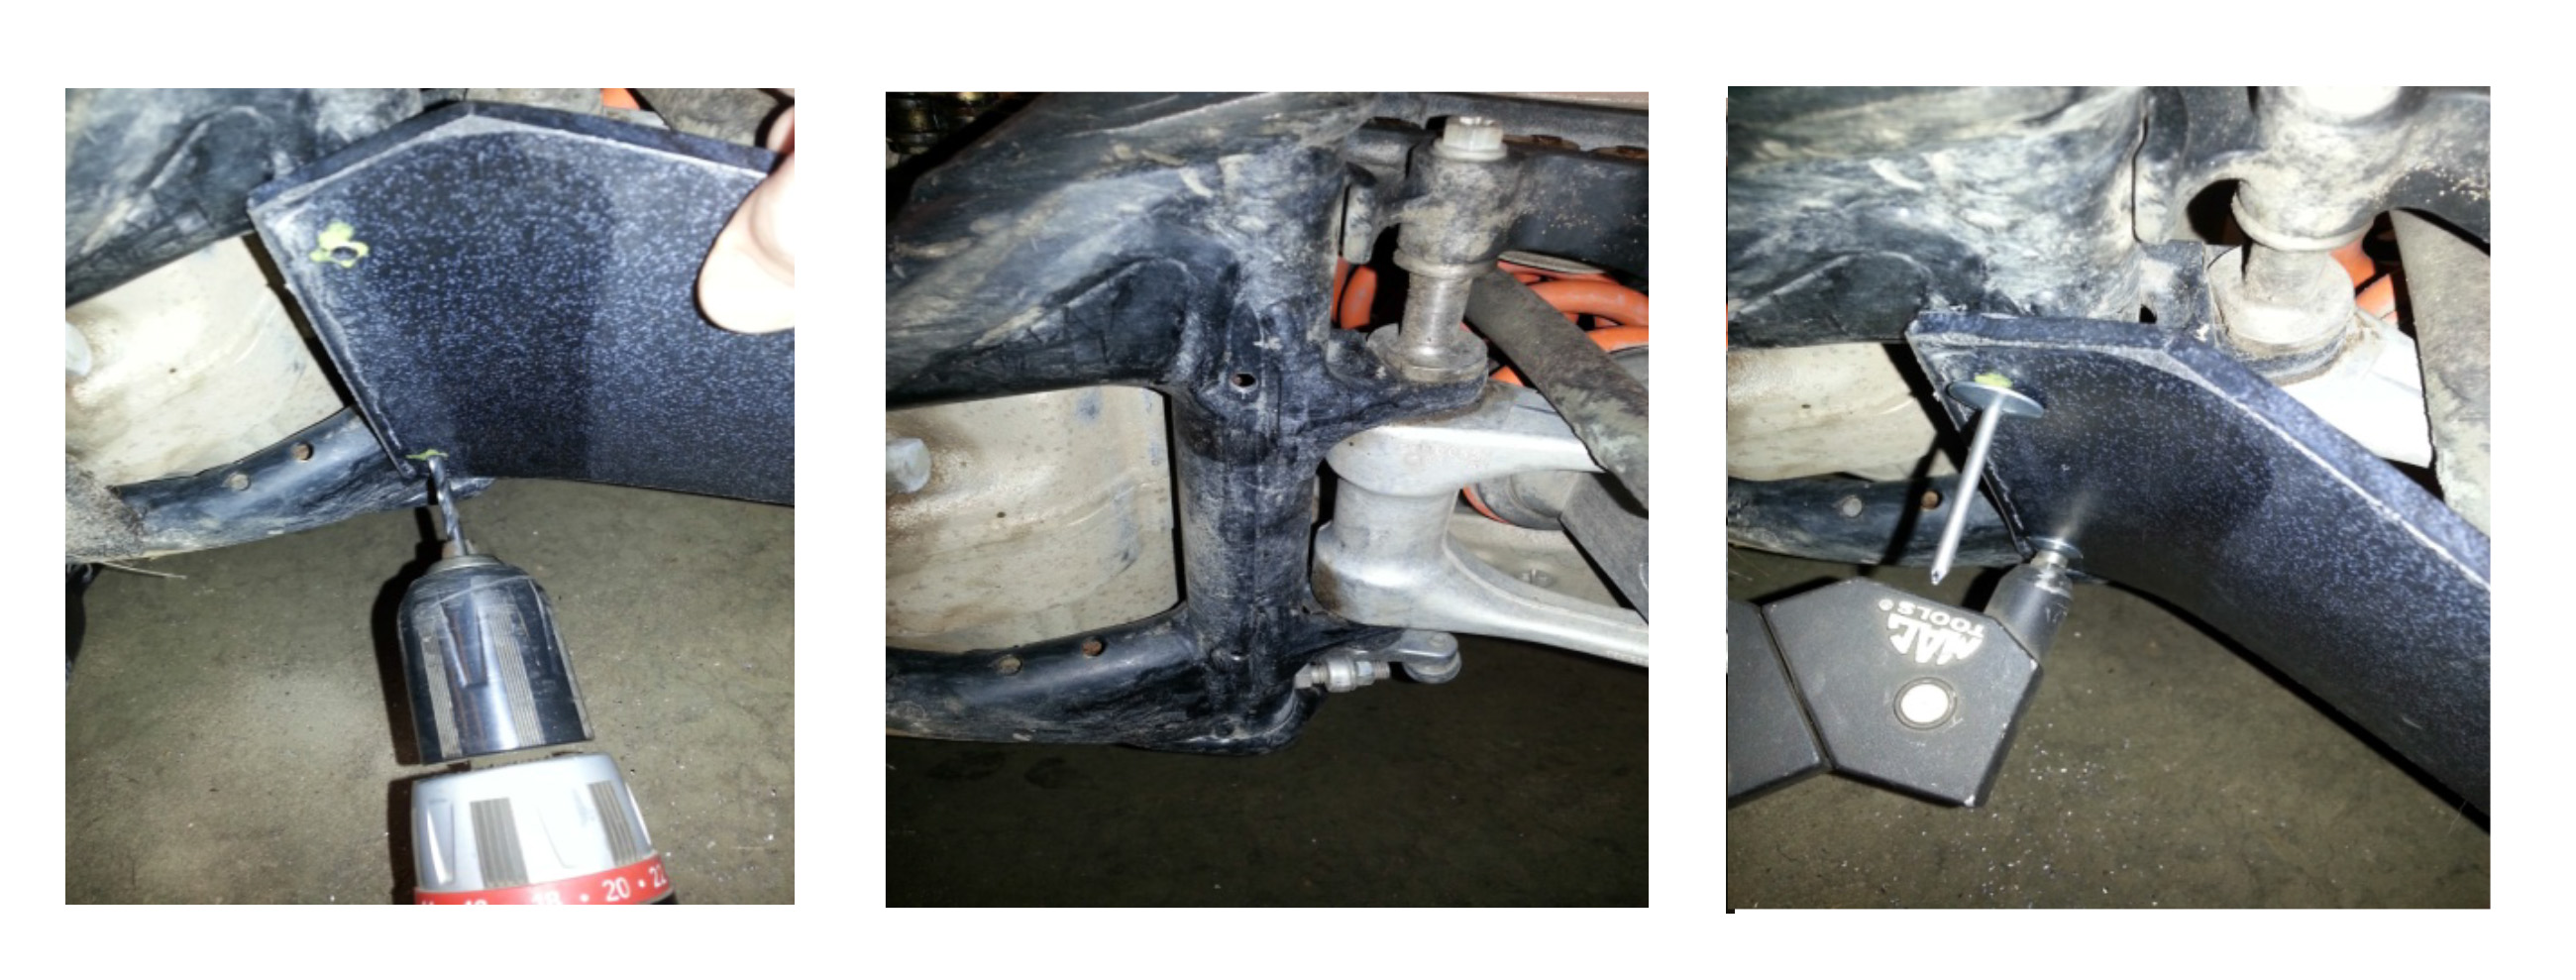
Aluminum Frame Mounting
Locate Mounting area. Some frames already have holes, some will need to be drilled. Start with the 6mm if possible in case of stripping or bolts breaking. That way you have the ability to tap to the next size or heli-coil if “something” happens with the 6mm holes.
Drill bits and taps are available if needed. NAPA part numbers are also included on info page.
Drill and tap holes. Run hardware into holes without slide plate. Paint bolt heads. Align slide plate and press firmly onto hardware marking holes to be drilled. Lower slide plate. Drill holes in the slide plate. You may find it easier to drill holes to the next size or elongate them. This will not affect durability.
Use blue loctite on bolts.

Existing Skid Plate
Loosen Skid plate mounting bolts and slightly lower skid plate removing the rear bolts. Slide the linkage slide plate under your skid plate. Mark holes on linkage slide plate. Drill holes in slide plate. You may find it easier to drill the holes one step larger or elongate them. This will not affect the durability of the linkage slide plate.
Use original skid plate mounting hardware or supplied hardware. Use blue loctite.